
Physical Computing: Week 3 - Tone Output & Servo Motor Control
Summary
Being that I love music and sound, the tone output lab is my favorite lab thus far. By completing this lab, I was able to dive into the different capabilities of how tone output can be used in future projects. As far as the servo motor control lab, that was a different story. The setup for this lab took me a bit longer than the tone output lab, considerably due to readjusting the header pins attached to the motor itself. Unfortunately, my motor was not pulsating as expected but I was able to identify why this may have been. So let’s get into it!
Tone Output
Setup:

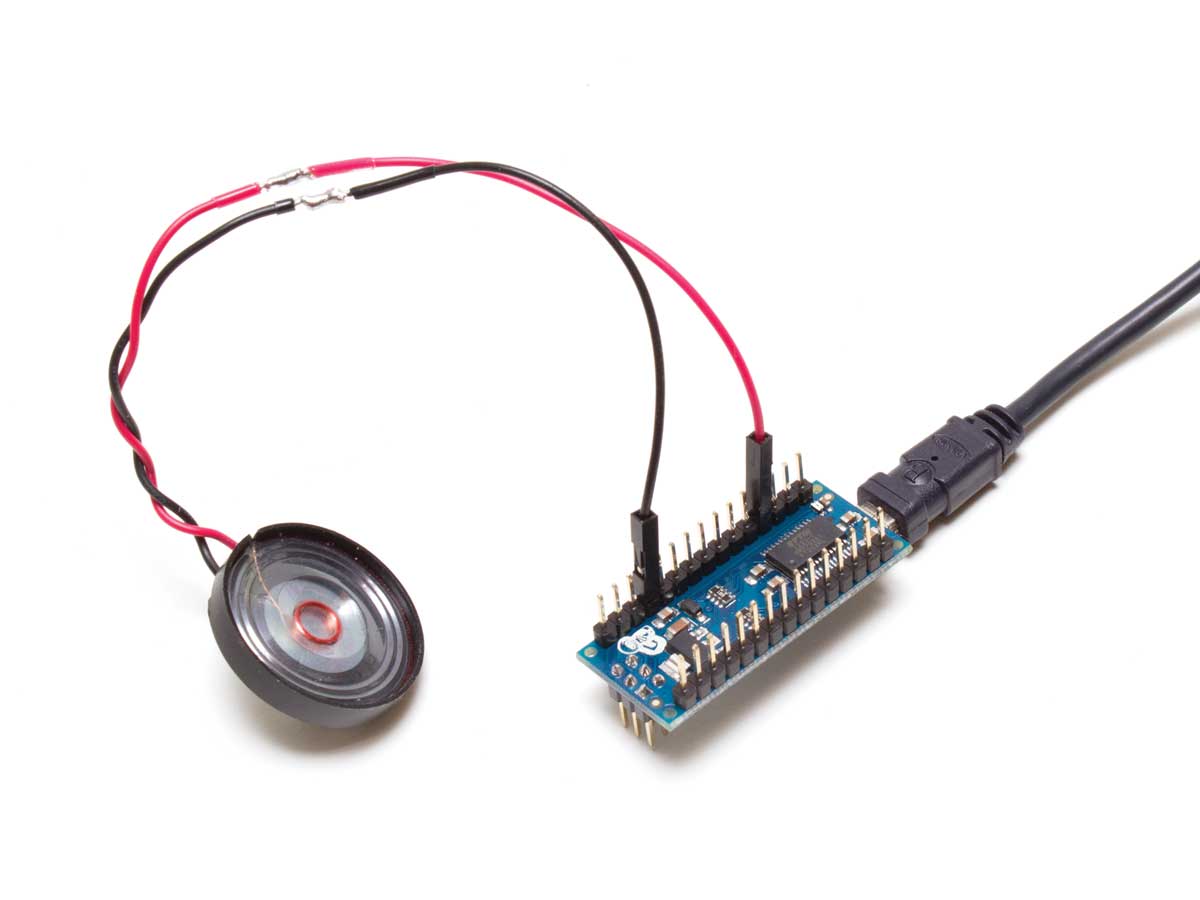
For this lab, the setup was fairly easy. The primary, and singular, difference from previous labs was the alligator clips that I used to attach the positive and negative of the speaker to the appropriate digital pin and ground resistor, respectively.
Code & Demo:
This block of code checks the sensor input range by initializing serial communication and printing out the corresponding values from the analog input reading.
1
2
3
4
5
6
7
8
void setup() {
  Serial.begin(9600);       // initialize serial communications
}

void loop() {
  int analogValue = analogRead(A0); // read the analog input
  Serial.println(analogValue);      // print it
}
This block of code checks to see if the speaker works by playing a single tone continuously. The tone() function generates a square wave of the specified frequency (440). The pin number, frequency and duration are the parameters, in order. Here is a video of this example demonstrated:
1
2
3
4
5
6
7
8
9
10
void setup() {
  // nothing to do here
}

void loop() {
  // play the tone for 1 second:
  tone(8, 440,1000);
  // do nothing else for the one second you're playing:
  delay(1000);
}
This block of code takes the sensor reading, maps it, and then plays the tone according to the mapped frequency.
1
2
3
4
5
6
7
8
9
10
11
12
13
14
void setup() {
  // nothing to do here
}

void loop() {
  // get a sensor reading:
  int sensorReading = analogRead(A0);
  // map the results from the sensor reading's range
  // to the desired pitch range:
  float frequency = map(sensorReading, 200, 900, 100, 1000);
  // change the pitch, play for 10 ms:
  tone(8, frequency, 10);
  delay(10);
}
This block of code is a bit more complex ; it ultimately plays a melody by using diffeent notes from a library, “pitches.h.” Here is a video of this example demonstrated:
As a side note, the musical instrument part of this lab will be my first class project, stay tuned.
Servo Motor Control
Setup:

This setup was a bit annoying at first, I must admit. The header pins had to be adjusted so that it can properly stay attached to the wires on the motor. It probably took me up to 20 minutes but once I watched the reference video, everything clicked (literally and figuratively).
1
2
3
4
5
6
7
8
9
10
11
12
13
14
15
16
17
18
19
20
21
22
#include "Servo.h"      // include the servo library

Servo servoMotor;       // creates an instance of the servo object to control a servo
int servoPin = 3;       // Control pin for servo motor

void setup() {
  Serial.begin(9600);       // initialize serial communications
  servoMotor.attach(servoPin);  // attaches the servo on pin 3 to the servo object
}

void loop()
{
  int analogValue = analogRead(A0); // read the analog input
  Serial.println(analogValue);      // print it

  // if your sensor's range is less than 0 to 1023, you'll need to
  // modify the map() function to use the values you discovered:
  int servoAngle = map(analogValue, 0, 1023, 0, 179);

  // move the servo using the angle from the sensor:
  servoMotor.write(servoAngle);
}
This block of code introduces the Servo library, which has many functions that help with programming any Servo motor. I created an instance of the servo object to access specific member functions of the servo. Then, I attached the pin to the servo and map the sensor reading which was used to pulsate the motor at the specified angle.
In short, it did not work for me. After investigating and hypothesising, it is safe to assume that I could have used a different sensor (potentiometer) which was also used in the reference video.
Takeaways
- Whenever stuck, ALWAYS refer to any reference videos that further explain the concept and can properly demonstrate the lab.
- When it comes to proper volume for tone output, transistors are vital.